Introduction
Since it’s the holiday season, it is the perfect time to do some software upgrades in the lab that are a bit more intense. NSX is one of them, although as you will see, it was not that difficult at all. However it involves quite a few steps. I also had some strange issues where my vyOS routers on ESXi 1 could not peer with BGP on the NSX Edge and when I migrated them to ESXi 2, all of a sudden it connected. Very strange!
When reading through the NSX 4.1.1 release notes, I noticed the following:
Fixed Issue 3219930: VM loses connectivity to the network after vMotion.
Network traffic will be down for the VMs that are affected by this issue.
Could it be that? I do have a fully automated DRS on the VSAN cluster. Anyway it’s a lab so let’s just go for it right? Having a VMUG Advantage membership makes it very easy. I just go to the downloads page and get the latest available version of most of the VMware stack.
At the time of writing, this was 4.1.1. Not the very latest, but if it fixes my previously stated issue, I’ll be happy.
Upgrade steps
Once I downloaded the upgrade bundle, I logged into my NSX manager to get started.
As you can see, the current version is NSX 4.1.0. There are 4 steps to complete, fingers crossed and go!

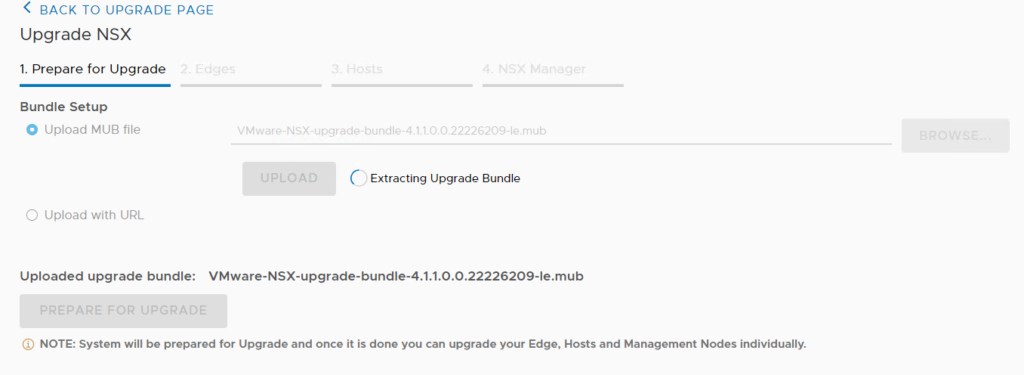
Bundle Setup
In the first step, we need to upload the MUB file (upgrade bundle) and click Upload.

In my case this took like 10-15 minutes to upload and extract the upgrade bundle. After all the package itself is 7-8 GB!

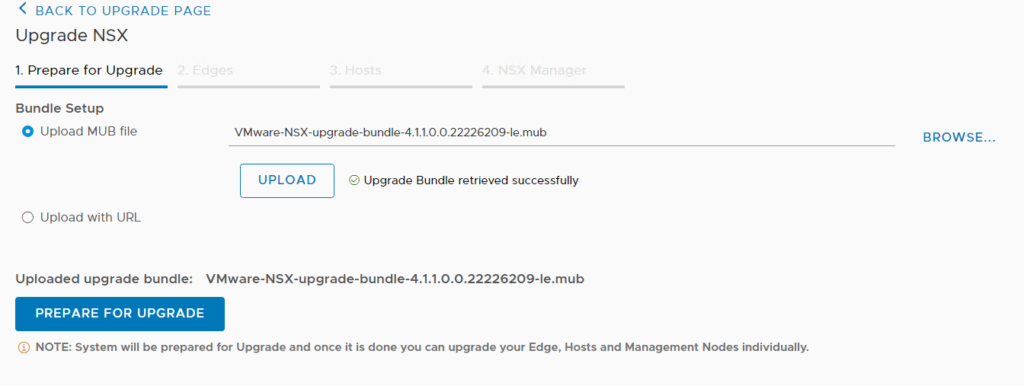
Once uploaded and extracted, the option to prepare for upgrade becomes available and we click it to proceed.
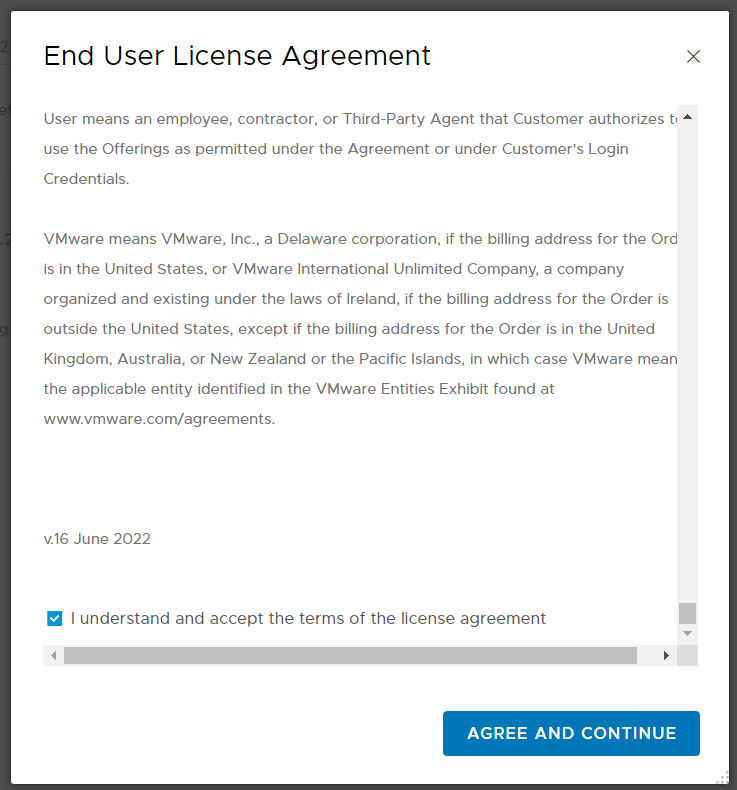
Accept the End User License Agreement, otherwise we’re done here.
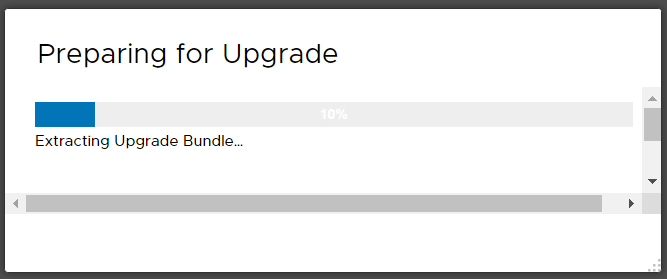
Some more extracting going on. It seems there’s quite a lot of work going on under the hood for an upgrade.

After all this, in terms of Pre-check Upgrade Bundle, we’re all good. Now we can start with the real pre-checks on the environment. This will check if there are no blockers that keep us from upgrading and prevent us getting stuck somewhere in the middle of the process.

Ran the pre-check in my lab and oops! Not looking very good! Glad this is not a real production environment! Errors along the entire board. On the other hand, I can learn a lot from this as I had no idea there were some things wrong as everything I’m using was just working.

Nested ESXi hosts
Then I remembered that next to my 2 physical ESXi hosts, I have a few Nested ESXi hosts as well and these were powered off. That explained the Hosts errors , however after booting them up, it still didn’t go through.
Issue (1) – Edge Node PNIC/Bond status down
As it turned out, I ran into this issue: https://vzerotohero.com/2021/07/nsx-t-edge-degraded-fp-eth0-pnic-down/.
The fix: A simple vMotion of the NSX Edges to another host and all ports were unblocked again and the UI showed UP and green:
Edge Transport Nodes

Ran another pre-check on all components and now I just had alarms related to “NSX was not able to fetch the information about latest Pre-Upgrade bundle released after the version 4.1.1.0.0.22226209” so I clicked Next to continue with the NSX Edges.
Upgrade Edges
It told me to resolve/acknowledge all pre-check issues to proceed so I did. Since these are not errors, we are good to proceed.
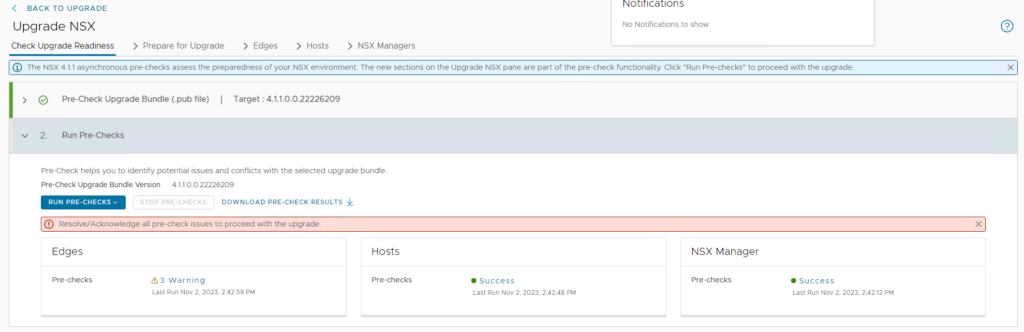

The warnings themselves also were a bit strange. It just said that the preparation succeeded. OK I suppose?

However warnings are not errors, so I clicked next and the upgrade started without any further trouble.
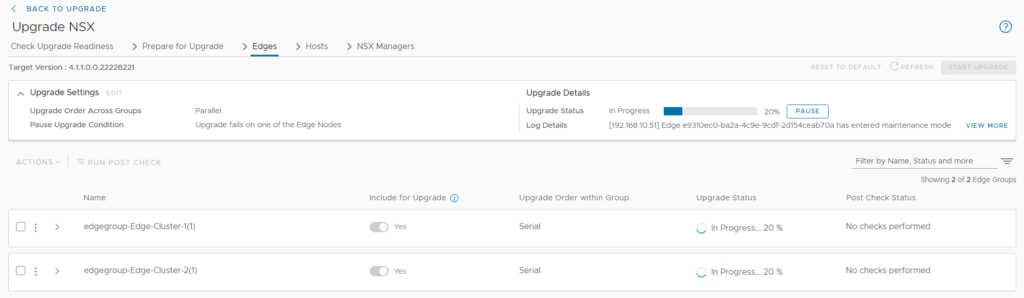
After a few minutes, both Edges upgraded successfully! DONE!

Upgrade Hosts
Nested ESXi Hosts
Up next are the Hosts. I start with my Nested ESXi hosts/cluster and leave my physical hosts out of it. This because those nested hosts run on those same physical hosts and I do not want to run into issues during the upgrade. I select the cluster that contains the Nested ESXi hosts and start the upgrade.

This went very smooth, zero errors! Nested ESXi cluster upgraded DONE!

Physical ESXi cluster
Up next is my physical ESXi cluster:

This cluster is a bit special as it runs vCLM for my 2-node VSAN, thus I receive some error since it’s not compliant with the configuration. First we need to fix this so we click on remediate all to upgrade the NSX components.
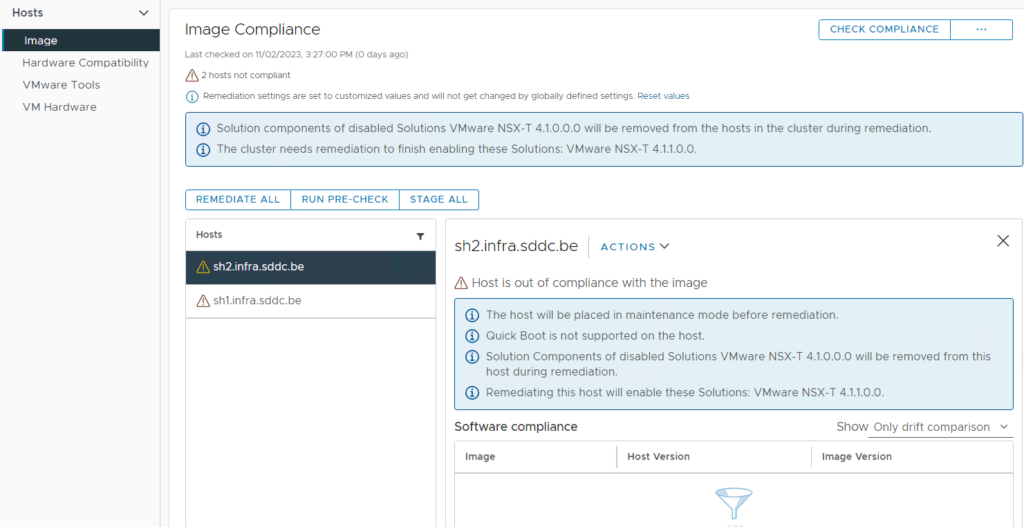
After a while, all hosts and images are compliant. Easy!

If we now look in NSX again, we can see that everything’s green in the physical ESXi cluster too. DONE!

Upgrading NSX Manager
This is the last step of the upgrade process with quite a lot of steps! However in my lab there’s only 1 NSX manager so fingers crossed and I click on start upgrade.

Issue (2) – NSX Manager not upgraded after reboot
Next issue I had was that the Pre-Upgrade Check would start, reboot the node and that’s it.
Nothing happened! I would always end up on the previous screen. Very strange!
After searching around, I found that increasing its memory can help. I shut down my NSX manager and upgraded its memory from 16 to 24 GB. The Node OS Upgrade continued immediately, wow! This is probably not something you will run into in a production environment, but in the lab for sure.
Again learnt something!
Then it reboots and the UI is no longer available, but we can check its progress via the CLI.
We can already see that the controller is version 4.1.1 which is a good sign.
NSX CLI (Manager, Policy, Controller 4.1.1.0.0.22226215). Press ? for command list or enter: help
nsx-mgr-1> get upgrade progress-status
****************************************************************************
Node Upgrade has been started. Please do not make any changes, until
the upgrade operation is complete. Run "get upgrade progress-status"
to show the progress of last upgrade step.
****************************************************************************
Thu Nov 02 2023 UTC 17:59:56.105
Upgrade info:
From-version: 4.1.0.0.0.21333676
To-version: 4.1.1.0.0.22226215
Upgrade steps:
download_os [2023-11-02 17:52:33 - 2023-11-02 17:53:14] SUCCESS
shutdown_manager [2023-11-02 17:53:14 - 2023-11-02 17:54:44] SUCCESS
install_os [2023-11-02 17:54:44 - 2023-11-02 17:55:43] SUCCESS
migrate_manager_config [2023-11-02 17:55:43 - 2023-11-02 17:55:48] SUCCESS
pin_ui [2023-11-02 17:55:48 - 2023-11-02 17:55:53] SUCCESS
switch_os [2023-11-02 17:55:53 - 2023-11-02 17:55:58] SUCCESS
reboot [2023-11-02 17:55:58 - 2023-11-02 17:56:42] SUCCESS
start_manager [2023-11-02 17:58:09 - ] IN_PROGRESS
------ Output of last step start ------
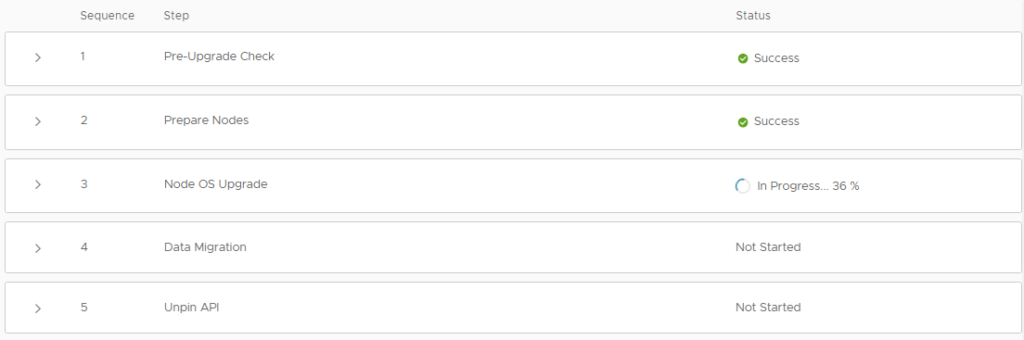
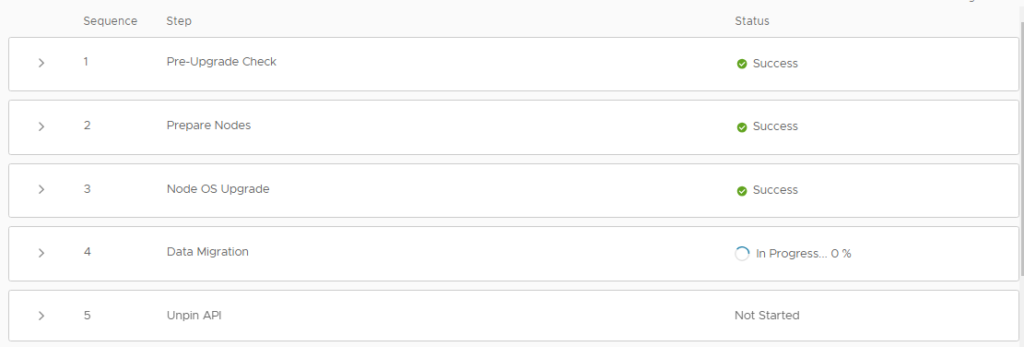
------ Output of last step end ------After 10 minutes, the UI responds again and we see the Node OS Upgrade has completed.
Up next: Data Migration.
A few minutes later, everything’s done and we can finish the NSX upgrade. DONE!

Once we click Finish we come back to the initial upgrade page and see everything’s completed successfully! The entire process was really straight forward and made as easy as possible. Good job!
We did run into two issues while upgrading, but both were related to my lab environment and I learnt something from them so that’s always good.

Before we wrap up and close the UI, let’s create a new configuration backup to make sure we’re safe.
The config is still intact so we can just press start backup and off we go.

That’s it! Nothing too exciting, but it was a fun experience!
Hope this was useful and thanks for reading!
