Intro
At Veeam we’ve had integration with AWS S3 and S3-compatible storage since VBR v9.5 Update 4. Back then it was only used as a capacity tier so for running some simple tests in the lab, I just used AWS S3.
Performance or anything else were not that important. In VBR v12 object storage integration got even better and now also supports using it as primary backup storage. This made me think about a few things:
- You should always go for 3-2-1 when it comes to backups. 3 copies of the data, on 2 different media and one should be off-site.
- My upload at home is currently maximum 100 Mbps (+- 12 MB/s) which is fine for secondary off-site backups, for primary backups not so great. It’s a lab, we want things to fly!
The search
It was definitely time to look into a solution for an on-premises S3-compatible storage that fulfils my requirements:
- free – it’s a homelab after all and it’s only used testing
- easy to install, use and update
- supports immutability (S3 Object Lock) – to test with VBR, VB365 and immutable backups
I quickly found out that some public cloud storage vendors had S3-compatible storage without API costs, thus no more egress costs. Awesome, but given my limited upload speed I continued my search.
Next up, I saw that many storage vendors were already offering ready-made appliances, just download as an OVA and deploy on VMware vSphere. Again awesome, however these looked pretty CPU and memory hungry so again, I kept searching.
Finally I came to MinIO S3 which seemed to be very light-weight, available as a Docker container and support immutability. My search seemed over and decided to give it a try. On the Internet I found many tutorials on how to deploy it, but there was always something missing in the configuration. After a few weeks of testing and playing with the Docker Compose file, I seemed to get exactly what I needed and so far works great. Even supports the SOSAPI!
Prerequisites (and where I installed it)
- VM running Ubuntu 2204 LTS
- Docker
- Docker Compose
- And some storage…either local or remote
Why not run the container directly on the Synology NAS? Good question, because it is indeed possible to run Docker on it. However, in the past, when I was fairly new to Docker and containers in general, I did run several containers on my NAS as it is very easy to get started. But in the end I preferred to keep my NAS as storage device and run my containers inside a VM. This makes backup (and restore) of any container data very easy. I’ve messed up many times before and then I could just restore the entire VM or files (with Veeam) in just a few clicks and all would be good again. Basically this setup saves me a lot of time when things need fixing.
Fast and easy deployment
In my lab I use docker compose to keep track of all the different containers and their config files.
This makes it also very easy to update the container(s).
The docker-compose.yml config file below:
- Pulls the latest image from the registry
- Uses the default ports for data and web UI
- Uses local storage to get started asap (in my case inside the VM so make sure you’ve got space)
- Sets a default user name and password for the web UI
- Runs under HTTP, not HTTPS !
version: '3'

services:
  minio:
    image: minio/minio
    ports:
      - "9000:9000" # default port for data
      - "9001:9001" # default port for console aka web UI
    volumes:
      - minio_storage:/data
    environment:
      MINIO_ROOT_USER: minio
      MINIO_ROOT_PASSWORD: minio123
    command: server --console-address ":9001" /data

volumes:
  minio_storage: {}
The result is that I can access the MinIO console via http on port 9001 and in VBR I use port 9000 to write data to the S3 bucket. No DNS needed, just the IP of your docker host + the port. Very easy!

While this container itself works fine, the main problem is that we cannot immediately use it with Veeam Backup & Replication (VBR). Why? Because it runs HTTP and VBR only accepts HTTPS. There is a way (read: registry key) to have VBR accept HTTP, but this should be only used for testing. If you need this, it’s better to open a support case at Veeam.
TLS certificates
The other way is to run it as HTTPS you need to setup TLS certificates a put them in the correct folder.
By default MinIO looks in the “certs” folder, for example:
${HOME}/.minio/certs
  private.key
  public.crt
Please check out the official MinIO documentation for more info.
To set up TSL certificates in an easy way, use certbot to generate FREE Let’s Encrypt certificates. Easy!
Note:
Let’s Encrypt certificates last 90 days and currently I create them automatically in another place. This means that every time they are renewed, I need to copy/paste them into the Minio config folder again and restart the container to pick up on them. Since it’s a lab, it’s not a big thing for me, but I’m sure this can be automated for more convenience.
I’ve created TLS certificates with 2 names in them (SAN). One for the S3 endpoint and one for the Web UI. I suppose creating a wildcard also works.
For example:
- s3.yourdomain.com
- console.s3.yourdomain.com
More advanced deployment using https and remote storage
As mentioned earlier, in my lab I like to keep the compute (VMs) and storage (NAS) separate and this is what I did for my MinIO deployment as well. While the setup looks similar to the “easy deployment” I’ve added a few items:
- Installed TLS certificates with Let’s Encrypt to run MinIO via HTTPS
- Set up Shared Folder on my Synology NAS and published it via NFS on the network
- Created several folders on the same storage to be able to use erasure encoding and use Object Lock. (Obviously it is recommended to use different storage devices, but this is a lab so I keep it simple for functional testing)
- Added a reverse proxy to get rid of the ports in the URL (I found pfsense with haproxy or traefik the easiest to deploy and get up and running)
Basically it will look like this. Pretty neat right?

Now both the console (on port 9001) and S3 bucket (on port 9000) are available via https. All traffic arrives at my reverse proxy which then forwards the traffic internally based on the source hostname. Next I mounted my remote NFS storage directly to the docker container. This makes it much more portable as well. In case I want to change my docker host, all I have to do is spin up the container and make sure I’ve got the right network access and NFS permissions.
Step 1 – Create the Shared Folder on the Synology NAS and publish via NFS
In DSM go to Control Panel -> Shared Folder -> Create Shared Folder
Give the folder a name and go through the wizard with all defaults to create the folder.
Once created, select the newly created folder and click Edit.
Go to the NFS Permissions tab and click Create to add a new NFS export:
Fill in the IP address of the Docker VM that is hosting the MinIO container as that’s from where the traffic will come and enter the settings as in the screenshot:

Note the Mount path at the left bottom. Write this down as we will need it in our docker-compose.yml configuration to mount the remote NFS mount.
Click Save to save the NFS rule and click again Save to save the Shared Folder’s settings.
Step 2 – Create multiple data folders within the Shared Folder
In DSM go to File Station and select the newly created Shared Folder. In my case it’s called containers.
Create a new folder called minio en double click the folder to enter it.
Inside the folder minio, create the following folders:
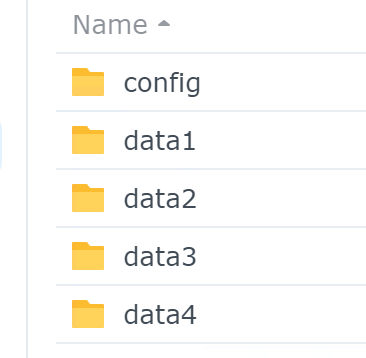
To be able to use Object Lock, we need a minimum of 4 data drives (folders in this test case).
Now enter the config folder, create a new folder called “certs” and copy/paste your TLS certificates to it:

It is important that you rename your certificates to private.key and public.crt as otherwise MinIO will not pick them up.

Great! Done on the storage side. Let’s move over to Docker and look at the docker-compose.yml configuration file.
Step 3 – On the Docker host, create a docker-compose.yml file and add the MinIO service:
The docker-compose.yml config file below:
- Pulls the latest image from the registry
- Uses the default ports for data and web UI
- Sets a default user name and password for the web UI
- Runs HTTPS as it will automatically pick up the TLS certificates from the /minio/certs folder
- Mount the remote NFS mounts as data volumes with read/write access
- Allows for immutability using Object Lock and Versioning.
version: "3.5"

services:
  minio:
    # single instance with erasure encode
    image: minio/minio:latest
    container_name: minio
    hostname: minio
    ports:
      - "9000:9000"
      - "9001:9001"
    environment:
      # Credentials
      MINIO_ROOT_USER: minio
      MINIO_ROOT_PASSWORD: minio123
      MINIO_DOMAIN: s3.yourdomain.com # S3 endpoint
      MINIO_SERVER_URL: https://s3.yourdomain.com # S3 endpoint
      MINIO_BROWSER_REDIRECT_URL: https://console.s3.yourdomain.com # Web UI
    # Health Check
    healthcheck:
      test: ["CMD", "curl", "-k", "-f", "https://127.0.0.1:9000/minio/health/live"]
      interval: 30s
      timeout: 20s
      retries: 3
    volumes:
      - type: volume
        source: config
        target: /root/.minio
        volume:
          nocopy: true
      - type: volume
        source: data1
        target: /data1
        volume:
          nocopy: true
      - type: volume
        source: data2
        target: /data2
        volume:
          nocopy: true
      - type: volume
        source: data3
        target: /data3
        volume:
          nocopy: true
      - type: volume
        source: data4
        target: /data4
        volume:
          nocopy: true
    command: server --console-address ":9001" /data{1...4}
    restart: unless-stopped
volumes:
  config:
    driver_opts:
      type: "nfs"
      o: "addr=192.168.20.11,nolock,soft,rw"
      device: ":/volume2/containers/minio/config"
  data1:
    driver_opts:
      type: "nfs"
      o: "addr=192.168.20.11,nolock,soft,rw"
      device: ":/volume2/containers/minio/data1"
  data2:
    driver_opts:
      type: "nfs"
      o: "addr=192.168.20.11,nolock,soft,rw"
      device: ":/volume2/containers/minio/data2"
  data3:
    driver_opts:
      type: "nfs"
      o: "addr=192.168.20.11,nolock,soft,rw"
      device: ":/volume2/containers/minio/data3"
  data4:
    driver_opts:
      type: "nfs"
      o: "addr=192.168.20.11,nolock,soft,rw"
      device: ":/volume2/containers/minio/data4"
Once the container is up and running we should be able to access the Web UI using the credentials set in the docker compose file.
Done!
You can now go and create S3 buckets, set up access keys and policies, then add them into VBR as object storage backup repositories. Happy testing!
